Why the transition between different roof levels is the most likely spot for a leak in your Windermere home
Windermere’s luxury estates feature complex roof designs with multiple levels, dormers, and intersecting planes. These architectural elements create roof transitions that are statistically the most vulnerable points for water intrusion. In fact, approximately 90% of roof leaks in Central Florida occur at these transition points rather than in the field of the shingles. Florida Building Code.
The combination of Windermere’s intense afternoon thunderstorms, high humidity, and hurricane-force winds creates perfect conditions for flashing failures. When different roof planes meet at valleys, hips, or wall intersections, the flashing systems must accommodate thermal expansion, wind uplift, and constant moisture exposure. Most homeowners discover leaks only after significant interior damage has occurred.
Understanding why these transitions fail requires examining the specific construction methods, materials, and local weather patterns that affect Windermere properties. From Spanish tile roofs to modern architectural shingles, each transition type presents unique challenges that demand specialized knowledge and installation techniques. Best Roofing Materials for Older Bungalows in Thornton Park.
Common types of roof transitions in Windermere homes
Windermere’s architectural diversity creates several transition scenarios that require different flashing approaches. Each type presents distinct failure patterns that experienced roofing contractors recognize immediately. Is Solar Roofing Actually Worth the Investment for Orlando Residents?.
Headwall transitions occur where a lower roof plane meets a vertical wall. These are particularly common in Windermere’s two-story Mediterranean-style homes where second-floor walls extend over first-floor roof sections. The flashing must extend up the wall at least 8 inches and integrate with the wall’s moisture barrier system.
Sidewall transitions happen when a roof plane meets a vertical sidewall, creating a perpendicular intersection. These are frequent in dormer installations and garage additions common in Windermere’s estate properties. The flashing must form a watertight seal while allowing for the roof’s thermal movement.
Pitch change transitions create valleys where two roof planes of different slopes meet. Windermere’s complex roof designs often feature low-slope sections transitioning to steeper pitches, particularly around second-story additions or covered patios. These valleys concentrate water flow and require wider flashing channels.
Gambrel and mansard transitions involve changes in roof profile rather than pitch. These architectural features common in Windermere’s historic-inspired designs create multiple intersection points where water can penetrate if flashing is improperly installed.
Chimney and skylight transitions represent specialized cases where roof openings require custom flashing solutions. The Florida Building Code mandates specific counter-flashing depths and sealant requirements for these penetration points.. Read more about Why the chimney on your Metrowest stucco home is the most likely spot for a leak.
Why flashing fails in the Orlando climate
Orlando’s climate creates conditions that accelerate flashing deterioration beyond what manufacturers typically account for. The combination of high UV exposure, humidity, and temperature fluctuations creates a perfect storm for material degradation.
UV radiation breaks down sealant compounds at the molecular level. Most caulks and sealants lose 50% of their elasticity within three years of Florida sun exposure. This degradation occurs unevenly, creating weak points where water can penetrate even if the flashing metal remains intact.
Thermal expansion and contraction cause metal flashing to move significantly more than in temperate climates. During Windermere’s afternoon thunderstorms, roof temperatures can drop 30 degrees in minutes, causing flashing to contract rapidly. This movement stresses sealant joints and can cause fastener holes to enlarge over time.
High humidity promotes algae and mold growth on flashing surfaces. While this growth doesn’t directly cause leaks, it retains moisture against metal surfaces, accelerating corrosion. Copper flashing develops a protective patina, but galvanized steel and aluminum require regular cleaning to prevent deterioration.
Hurricane-force winds create uplift pressure that can separate flashing from wall surfaces. Wind-driven rain can penetrate even small gaps, and once water enters the wall cavity, it can travel horizontally before appearing as a ceiling stain inside the home.
Salt air from coastal proximity, though Windermere is inland, still affects roofing materials through atmospheric deposition. This salt accelerates corrosion of galvanized steel flashing, reducing its effective lifespan by 30-40% compared to inland installations. TPO vs EPDM Roofing Guide.
Materials and specifications for Florida roof flashing
Florida Building Code Section 1507.2.10 mandates specific flashing requirements for roof transitions in high-velocity hurricane zones. These requirements exceed national standards due to Central Florida’s extreme weather exposure.
Galvanized steel flashing must meet ASTM A653 specifications with G90 coating weight for Windermere installations. This provides approximately 15-20 years of service life before corrosion becomes problematic. The minimum thickness requirement is 0.019 inches for standard applications. ASTM International standards.
Aluminum flashing offers better corrosion resistance but requires specific alloy selection. The Florida code allows 3003-H14 alloy for most applications, but 6063-T5 is required for coastal-adjacent properties due to its superior salt spray resistance.
Copper flashing represents the premium option with 50+ year service life. The natural patina that develops provides additional corrosion protection. However, copper costs approximately 4-5 times more than galvanized steel, making it primarily a choice for high-end Windermere estates.
Kynar 500 coated aluminum provides excellent color retention and UV resistance. This fluoropolymer finish prevents chalking and fading common with standard painted aluminum. The coating adds approximately $1.50 per linear foot to flashing costs but extends service life by 10-15 years.
Sealant selection proves critical for transition durability. Polyurethane sealants offer superior UV resistance and adhesion compared to silicone products. The Florida code requires minimum 30-year rated sealants for all roof-to-wall transitions in Windermere’s wind zone.
Butyl tape provides excellent initial sealing for under-flashing applications. This material remains flexible across a wider temperature range than caulk and creates an immediate waterproof barrier during installation.
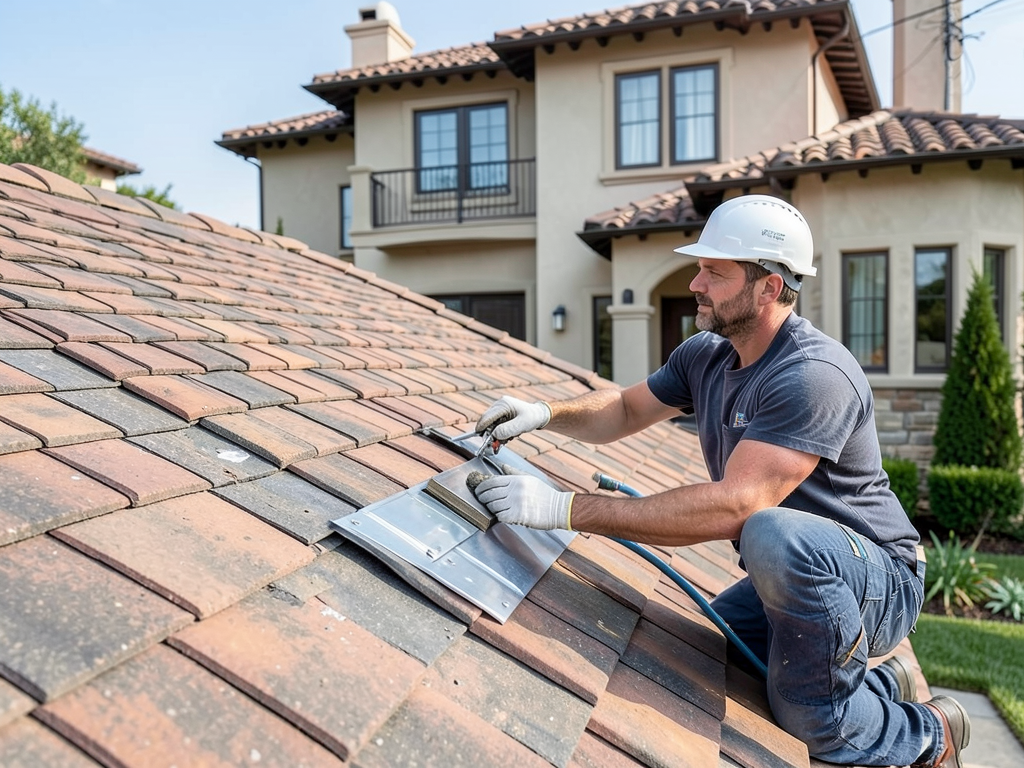
The installation process: professional flashing techniques
Professional flashing installation follows a systematic approach that addresses each potential failure point. The process begins with substrate preparation and ends with quality verification testing.
Step one involves removing existing materials to expose the roof deck and wall sheathing. This allows inspection for rot, water damage, or structural issues that could compromise the new installation. Any damaged wood must be replaced before proceeding. Reliable Roof Inspection Services for Home Buyers in Winter Garden.
Underlayment installation creates the secondary water barrier required by Florida Building Code. This involves applying self-adhering ice and water shield at least 12 inches up the wall and across the roof deck. The material must overlap correctly to prevent water migration under the flashing.
Base flashing installation begins at the lowest point and works upward. Each piece overlaps the previous by at least 4 inches to create a shingling effect. Fasteners must be corrosion-resistant and placed to avoid creating water entry points.
Step flashing installation requires precise cutting and bending to fit each roof course. The flashing pieces must extend up the wall at least 4 inches and overlap adjacent pieces by 2 inches. This creates a continuous barrier that moves independently of the roof and wall materials.
Counter-flashing installation secures the top edge of the flashing system. This involves cutting into the mortar joint of brick or stucco walls and inserting the counter-flashing a minimum of 1.5 inches. The joint must then be sealed with appropriate sealant.
Sealant application requires specific techniques to ensure proper adhesion. The joint must be clean and dry, and the sealant must be tooled to create a concave surface that sheds water. Backer rod may be required for deep joints to control sealant thickness.
Quality verification involves water testing the completed installation. This test uses a garden hose to simulate rainfall while inspecting from inside the attic for any signs of water penetration. Any leaks must be addressed before final payment.
Cost factors and maintenance recommendations
Flashing repair costs in Windermere vary significantly based on several factors. Simple step flashing replacement for a standard dormer might cost $800-1,200, while complete valley system replacement in a complex roof design could exceed $5,000.. Read more about How your pool cage attachment could be slowly pulling apart your Dr. Phillips roof.
Material selection represents the largest cost variable. Copper flashing costs 400-500% more than galvanized steel but provides superior longevity. For most Windermere homeowners, aluminum with Kynar coating offers the best balance of cost and durability.
Roof accessibility affects labor costs substantially. Two-story homes require additional safety equipment and time for proper installation. Steep roof pitches also increase labor time by 30-50% compared to walkable slopes.
Existing damage discovery often expands project scope. Rotted decking, damaged underlayment, or structural issues found during removal must be addressed before flashing installation can proceed. This can add $1,000-3,000 to project costs.
Warranty considerations influence material and labor choices. Standard flashing repairs typically carry 5-10 year warranties, while premium installations with copper flashing may include 25-year coverage. The warranty cost is built into the installation price.
Maintenance frequency depends on material selection and exposure conditions. Galvanized steel flashing should be inspected annually for corrosion, while copper flashing requires inspection every 3-5 years. Any sealant joints should be checked bi-annually for cracking or separation.
Post-storm inspections become critical after major weather events. Wind-driven rain can exploit even minor flashing gaps, and hurricane-force winds can separate poorly secured flashing from wall surfaces. Annual inspections before hurricane season are strongly recommended.
DIY flashing repairs often create more problems than they solve. Without proper materials and techniques, amateur repairs typically fail within 1-2 years, leading to more extensive damage and higher repair costs.
Warning signs of flashing failure
Early detection of flashing problems can prevent extensive interior damage. Several warning signs indicate potential flashing failure before major leaks develop.
Water stains on interior walls near roof lines often indicate flashing problems. These stains may appear small but can indicate significant water intrusion behind the wall. The stain’s location typically corresponds to the flashing’s position on the exterior.
Cracked or missing sealant around roof transitions represents an immediate concern. Even small gaps can allow wind-driven rain to penetrate, especially during Orlando’s intense afternoon thunderstorms. Sealant failure often precedes flashing material failure by several years.
Rust stains on exterior walls below roof lines suggest galvanized steel flashing corrosion. The rust indicates the protective coating has failed, and the metal is deteriorating. This corrosion typically progresses from the bottom edge upward.
Missing or damaged shingles near transition points can compromise flashing effectiveness. Shingles protect the top edge of step flashing, and their absence exposes this critical area to water infiltration.
Bubbling or peeling paint on exterior walls near roof lines may indicate moisture behind the surface. This moisture often originates from flashing failures that allow water to enter the wall cavity.
Drafts or temperature differences near ceiling-wall junctions can indicate air infiltration through flashing gaps. While not immediately causing water damage, these gaps will eventually allow water entry during wind-driven rain events.
Mold or mildew odors in attics near transition areas suggest moisture accumulation. This moisture often results from minor flashing leaks that allow gradual water intrusion over extended periods.
Visible gaps between flashing and wall surfaces represent immediate failure points. These gaps may result from thermal movement, material deterioration, or improper initial installation. Choosing Between Shingle and Tile Roofs for Your Central Florida Home.
Professional inspection and repair process
Professional roof inspection involves systematic evaluation of all transition points using specialized equipment and techniques. This process identifies both obvious and hidden problems that could lead to future leaks.
Visual inspection begins with examining all accessible flashing from ground level using binoculars. This identifies obvious damage, missing pieces, or severe corrosion. However, many problems require closer examination to detect.
Ladder inspection allows detailed examination of flashing condition, sealant integrity, and fastener security. The inspector checks for proper overlap, correct fastening patterns, and signs of movement or separation.
Moisture scanning uses thermal imaging cameras to detect temperature differences that indicate water presence behind surfaces. This technology can identify problems before visible water damage occurs inside the home.
Core sampling may be necessary for suspected hidden damage. This involves removing small sections of roofing material to inspect the underlying structure and flashing condition. This destructive testing is typically limited to areas with suspected problems.
Water testing verifies suspected leak locations by simulating rainfall conditions. This controlled testing helps isolate the exact source of leaks that may appear far from the actual failure point due to water travel within wall cavities.
Repair planning considers both immediate needs and long-term durability. The plan must address all identified problems while considering the homeowner’s budget and the property’s specific exposure conditions.
Permit requirements vary by municipality but often apply to flashing repairs exceeding certain cost thresholds. Windermere requires permits for most roof repairs, ensuring compliance with current building codes and proper inspection of completed work.
Insurance considerations become important when damage results from covered events like windstorms or hail. Most policies cover sudden damage but exclude gradual deterioration from lack of maintenance. Documentation of regular inspections can support insurance claims.
Frequently Asked Questions
How long should roof flashing last in Florida’s climate?
Quality flashing materials typically last 15-25 years in Florida, though copper can exceed 50 years. Galvanized steel often fails first due to corrosion, while aluminum with proper coating can approach the 25-year mark. Regular maintenance can extend service life significantly.
Can I repair flashing myself or should I hire a professional?
Professional installation is strongly recommended for flashing repairs. The specialized knowledge, materials, and techniques required make DIY repairs prone to premature failure. Improper flashing can cause extensive interior damage before visible signs appear, making professional installation cost-effective long-term.
What’s the difference between step flashing and counter-flashing?
Step flashing consists of individual pieces that integrate with each course of roofing material, while counter-flashing is installed into the wall surface to cover the top edge of step flashing. Together they create a two-layer system that accommodates building movement while maintaining a waterproof barrier.
How much does flashing repair typically cost in Windermere?
Flashing repair costs range from $800-5,000 depending on complexity, materials, and extent of damage. Simple repairs might cost $800-1,500, while complete valley system replacement in complex roofs can exceed $5,000. Most homeowners spend $1,500-2,500 for typical flashing repairs.
How can I tell if my flashing needs repair?
Warning signs include water stains on interior walls, cracked or missing sealant, rust stains on exterior walls, missing or damaged shingles near transitions, bubbling paint, mold odors in attics, and visible gaps between flashing and wall surfaces. Annual professional inspections can identify problems before major damage occurs.. Read more about Choosing between concrete and clay tiles for your Windermere estate.
Protect your Windermere home from costly water damage
Roof transitions represent the most vulnerable points in your home’s water protection system. The complex roof designs common in Windermere’s luxury estates create multiple transition points where water can penetrate if flashing systems fail. Understanding these vulnerabilities and addressing them proactively can prevent thousands of dollars in interior damage.
Central Florida’s extreme weather conditions accelerate flashing deterioration beyond what national averages suggest. The combination of intense UV exposure, thermal cycling, high humidity, and hurricane-force winds creates conditions that challenge even quality installation. Regular inspection and maintenance become essential for protecting your investment.
Professional flashing installation requires specialized knowledge of local building codes, material specifications, and installation techniques specific to Florida’s climate. The difference between amateur and professional work often becomes apparent only after leaks develop, making initial quality installation crucial for long-term performance.
Don’t wait for water stains to appear on your ceiling before addressing potential flashing problems. The cost of preventive maintenance pales in comparison to interior repairs, mold remediation, and structural repairs that result from prolonged water intrusion. Your home deserves the protection that comes from quality flashing systems installed by experienced professionals.
Call (689) 268-2855 today to schedule your comprehensive roof inspection. Our Orlando roofing specialists will identify potential problems before they cause damage and provide solutions that protect your Windermere home for years to come.
{
“@context”: “https://schema.org”,
“@type”: “BlogPosting”,
“headline”: “Why the transition between different roof levels is the most likely spot for a leak in your Windermere home”,
“description”: “Learn why roof transitions in Windermere’s luxury estates cause 90% of leaks. Discover flashing failures, local weather impact, and expert repair solutions from Orlando roofing specialists.”,
“wordCount”: 2584,
“datePublished”: “2026-06-02T14:28:00.000Z”,
“dateModified”: “2026-06-02T14:28:00.000Z”,
“inLanguage”: “en-US”,
“mainEntityOfPage”: {
“@type”: “WebPage”,
“@id”: “https://allproroofingorlando.com”
},
“publisher”: {
“@type”: “LocalBusiness”,
“name”: “All Pro Roofing Orlando”,
“url”: “https://allproroofingorlando.com”
},
“author”: {
“@type”: “Organization”,
“name”: “All Pro Roofing Orlando”,
“url”: “https://allproroofingorlando.com”
},
“image”: {
“@type”: “ImageObject”,
“url”: “https://allproroofingorlando.com/wp-content/uploads/2026/03/why-the-transition-between-different-roof-levels-i-1.png”
}
}
{
“@context”: “https://schema.org”,
“@type”: “RoofingContractor”,
“name”: “All Pro Roofing Orlando”,
“url”: “https://allproroofingorlando.com”,
“address”: {
“@type”: “PostalAddress”,
“addressLocality”: “Orlando”
},
“areaServed”: {
“@type”: “City”,
“name”: “Orlando”
}
}
{
“@context”: “https://schema.org”,
“@type”: “FAQPage”,
“mainEntity”: [
{
“@type”: “Question”,
“name”: “How long should roof flashing last in Florida’s climate?”,
“acceptedAnswer”: {
“@type”: “Answer”,
“text”: “Quality flashing materials typically last 15-25 years in Florida, though copper can exceed 50 years. Galvanized steel often fails first due to corrosion, while aluminum with proper coating can approach the 25-year mark. Regular maintenance can extend service life significantly.”
}
},
{
“@type”: “Question”,
“name”: “Can I repair flashing myself or should I hire a professional?”,
“acceptedAnswer”: {
“@type”: “Answer”,
“text”: “Professional installation is strongly recommended for flashing repairs. The specialized knowledge, materials, and techniques required make DIY repairs prone to premature failure. Improper flashing can cause extensive interior damage before visible signs appear, making professional installation cost-effective long-term.”
}
},
{
“@type”: “Question”,
“name”: “What’s the difference between step flashing and counter-flashing?”,
“acceptedAnswer”: {
“@type”: “Answer”,
“text”: “Step flashing consists of individual pieces that integrate with each course of roofing material, while counter-flashing is installed into the wall surface to cover the top edge of step flashing. Together they create a two-layer system that accommodates building movement while maintaining a waterproof barrier.”
}
},
{
“@type”: “Question”,
“name”: “How much does flashing repair typically cost in Windermere?”,
“acceptedAnswer”: {
“@type”: “Answer”,
“text”: “Flashing repair costs range from $800-5,000 depending on complexity, materials, and extent of damage. Simple repairs might cost $800-1,500, while complete valley system replacement in complex roofs can exceed $5,000. Most homeowners spend $1,500-2,500 for typical flashing repairs.”
}
},
{
“@type”: “Question”,
“name”: “How can I tell if my flashing needs repair?”,
“acceptedAnswer”: {
“@type”: “Answer”,
“text”: “Warning signs include water stains on interior walls, cracked or missing sealant, rust stains on exterior walls, missing or damaged shingles near transitions, bubbling paint, mold odors in attics, and visible gaps between flashing and wall surfaces. Annual professional inspections can identify problems before major damage occurs.”
}
}
]
}
{
“@context”: “https://schema.org”,
“@type”: “BreadcrumbList”,
“itemListElement”: [
{
“@type”: “ListItem”,
“position”: 1,
“name”: “Home”,
“item”: “https://allproroofingorlando.com”
},
{
“@type”: “ListItem”,
“position”: 2,
“name”: “Blog”,
“item”: “https://allproroofingorlando.com/blog”
},
{
“@type”: “ListItem”,
“position”: 3,
“name”: “Why the transition between different roof levels is the most likely spot for a leak in your Windermere home”
}
]
}
{
“@context”: “https://schema.org”,
“@type”: “Service”,
“serviceType”: “Roofing”,
“provider”: {
“@type”: “LocalBusiness”,
“name”: “All Pro Roofing Orlando”,
“url”: “https://allproroofingorlando.com”
},
“areaServed”: {
“@type”: “City”,
“name”: “Orlando”
},
“description”: “Learn why roof transitions in Windermere’s luxury estates cause 90% of leaks. Discover flashing failures, local weather impact, and expert repair solutions from Orlando roofing specialists.”
}